Vinyl Shirt Placement Guide Printable - Web here are some htv sizing and placement charts for different models of shirts, such as children’s shirts, youth shirts and adult shirts. Find this pin and more on cricut projects by crafting a lovely life. The easiest and fastest way to find the center of a shirt is to fold the shirt lengthwise lining up the shoulder seams at. Web using a tape measure, measure 2″ to 3.5″ down from the collar on the front and back of the shirt, depending on the style. Starting with an adult size small, set your standard transfer width at 8”. The first thing i do is find the exact center of the shirt. Web 7.5 to 9 from the shoulder's left seam and 4 to 6 from the center, in line with the collar meeting the shoulder seam. Web so here are my guidelines for determining the proper size and placement of a vinyl decal on a shirt. Place top of design 1.5 below neckline. Upload the svg files to cricut design space and add them to.

Vinyl Placement On Back Of Shirt Pinterest in 2020 Cricut projects
Web check out our vinyl placement guide for tshirt selection for the very best in unique or custom, handmade pieces from our shops. This is just a starting point!) a baby onesie is around 3x3. Place top of design 1.5 below neckline. Web here are some htv sizing and placement charts for different models of shirts, such as children’s shirts,.

vinyl placement on back of shirt Google Search Cricut projects
Web find the center of a shirt for decal placement. This can be used with sublimation shirts, iron on vinyl, htv, or any way you are making shirts. Web 7.5 to 9 from the shoulder's left seam and 4 to 6 from the center, in line with the collar meeting the shoulder seam. I just didn't want to forget what.

Pin by Donna Sadler on Cricut T shirt image, Shirt designs, Htv shirts
Web check out our vinyl placement guide for tshirt selection for the very best in unique or custom, handmade pieces from our shops. Upload the svg files to cricut design space and add them to. This is just a starting point!) a baby onesie is around 3x3. To clarify, for each of them the size is only a recommendation. The.

HTV Sizing and Placement Chart Cricut tutorials, Cricut projects
Place top of design 1.5 below neckline. Web check out our vinyl placement guide for tshirt selection for the very best in unique or custom, handmade pieces from our shops. Web 7.5 to 9 from the shoulder's left seam and 4 to 6 from the center, in line with the collar meeting the shoulder seam. Web so here are my.

Pin by Lisa Roberson on **PLACEMENT CHARTS** Tshirt artwork
Web check out our printable vinyl shirts selection for the very best in unique or custom, handmade pieces from our drawings & sketches shops. I just didn't want to forget what size it was!) 7x7 is great for youth sizes. Use my 50% rule to get the right decal size for shirts if you are designing a shirt and you’re.

HTV Size and Design Placement Chart for TShirts Heat transfer vinyl
Web here are my recommendations: This can be used with sublimation shirts, iron on vinyl, htv, or any way you are making shirts. Web our guideline for beginners in 2023 will introduce you vinyl size for shirts, decal size for shirts, shirt decal size, htv size chart, vinyl decal size chart, cricut shirt size guide, t shirt design placement guide,.

Heat Transfer Vinyl Sizing & Placement Chart 1000 in 2020 Cricut
This shirt is youth size medium (and of course you want to take off the tag before you heat press! Starting with an adult size small, set your standard transfer width at 8”. Web so here are my guidelines for determining the proper size and placement of a vinyl decal on a shirt. Web using a tape measure, measure 2″.

42+ Heat transfer vinyl shirt placement ideas in 2021 This is Edit
The easiest and fastest way to find the center of a shirt is to fold the shirt lengthwise lining up the shoulder seams at. Upload the svg files to cricut design space and add them to. For a standard toddler shirt, start with around 5x5 (and remember you can go up and down a few inches! Web before you cut.
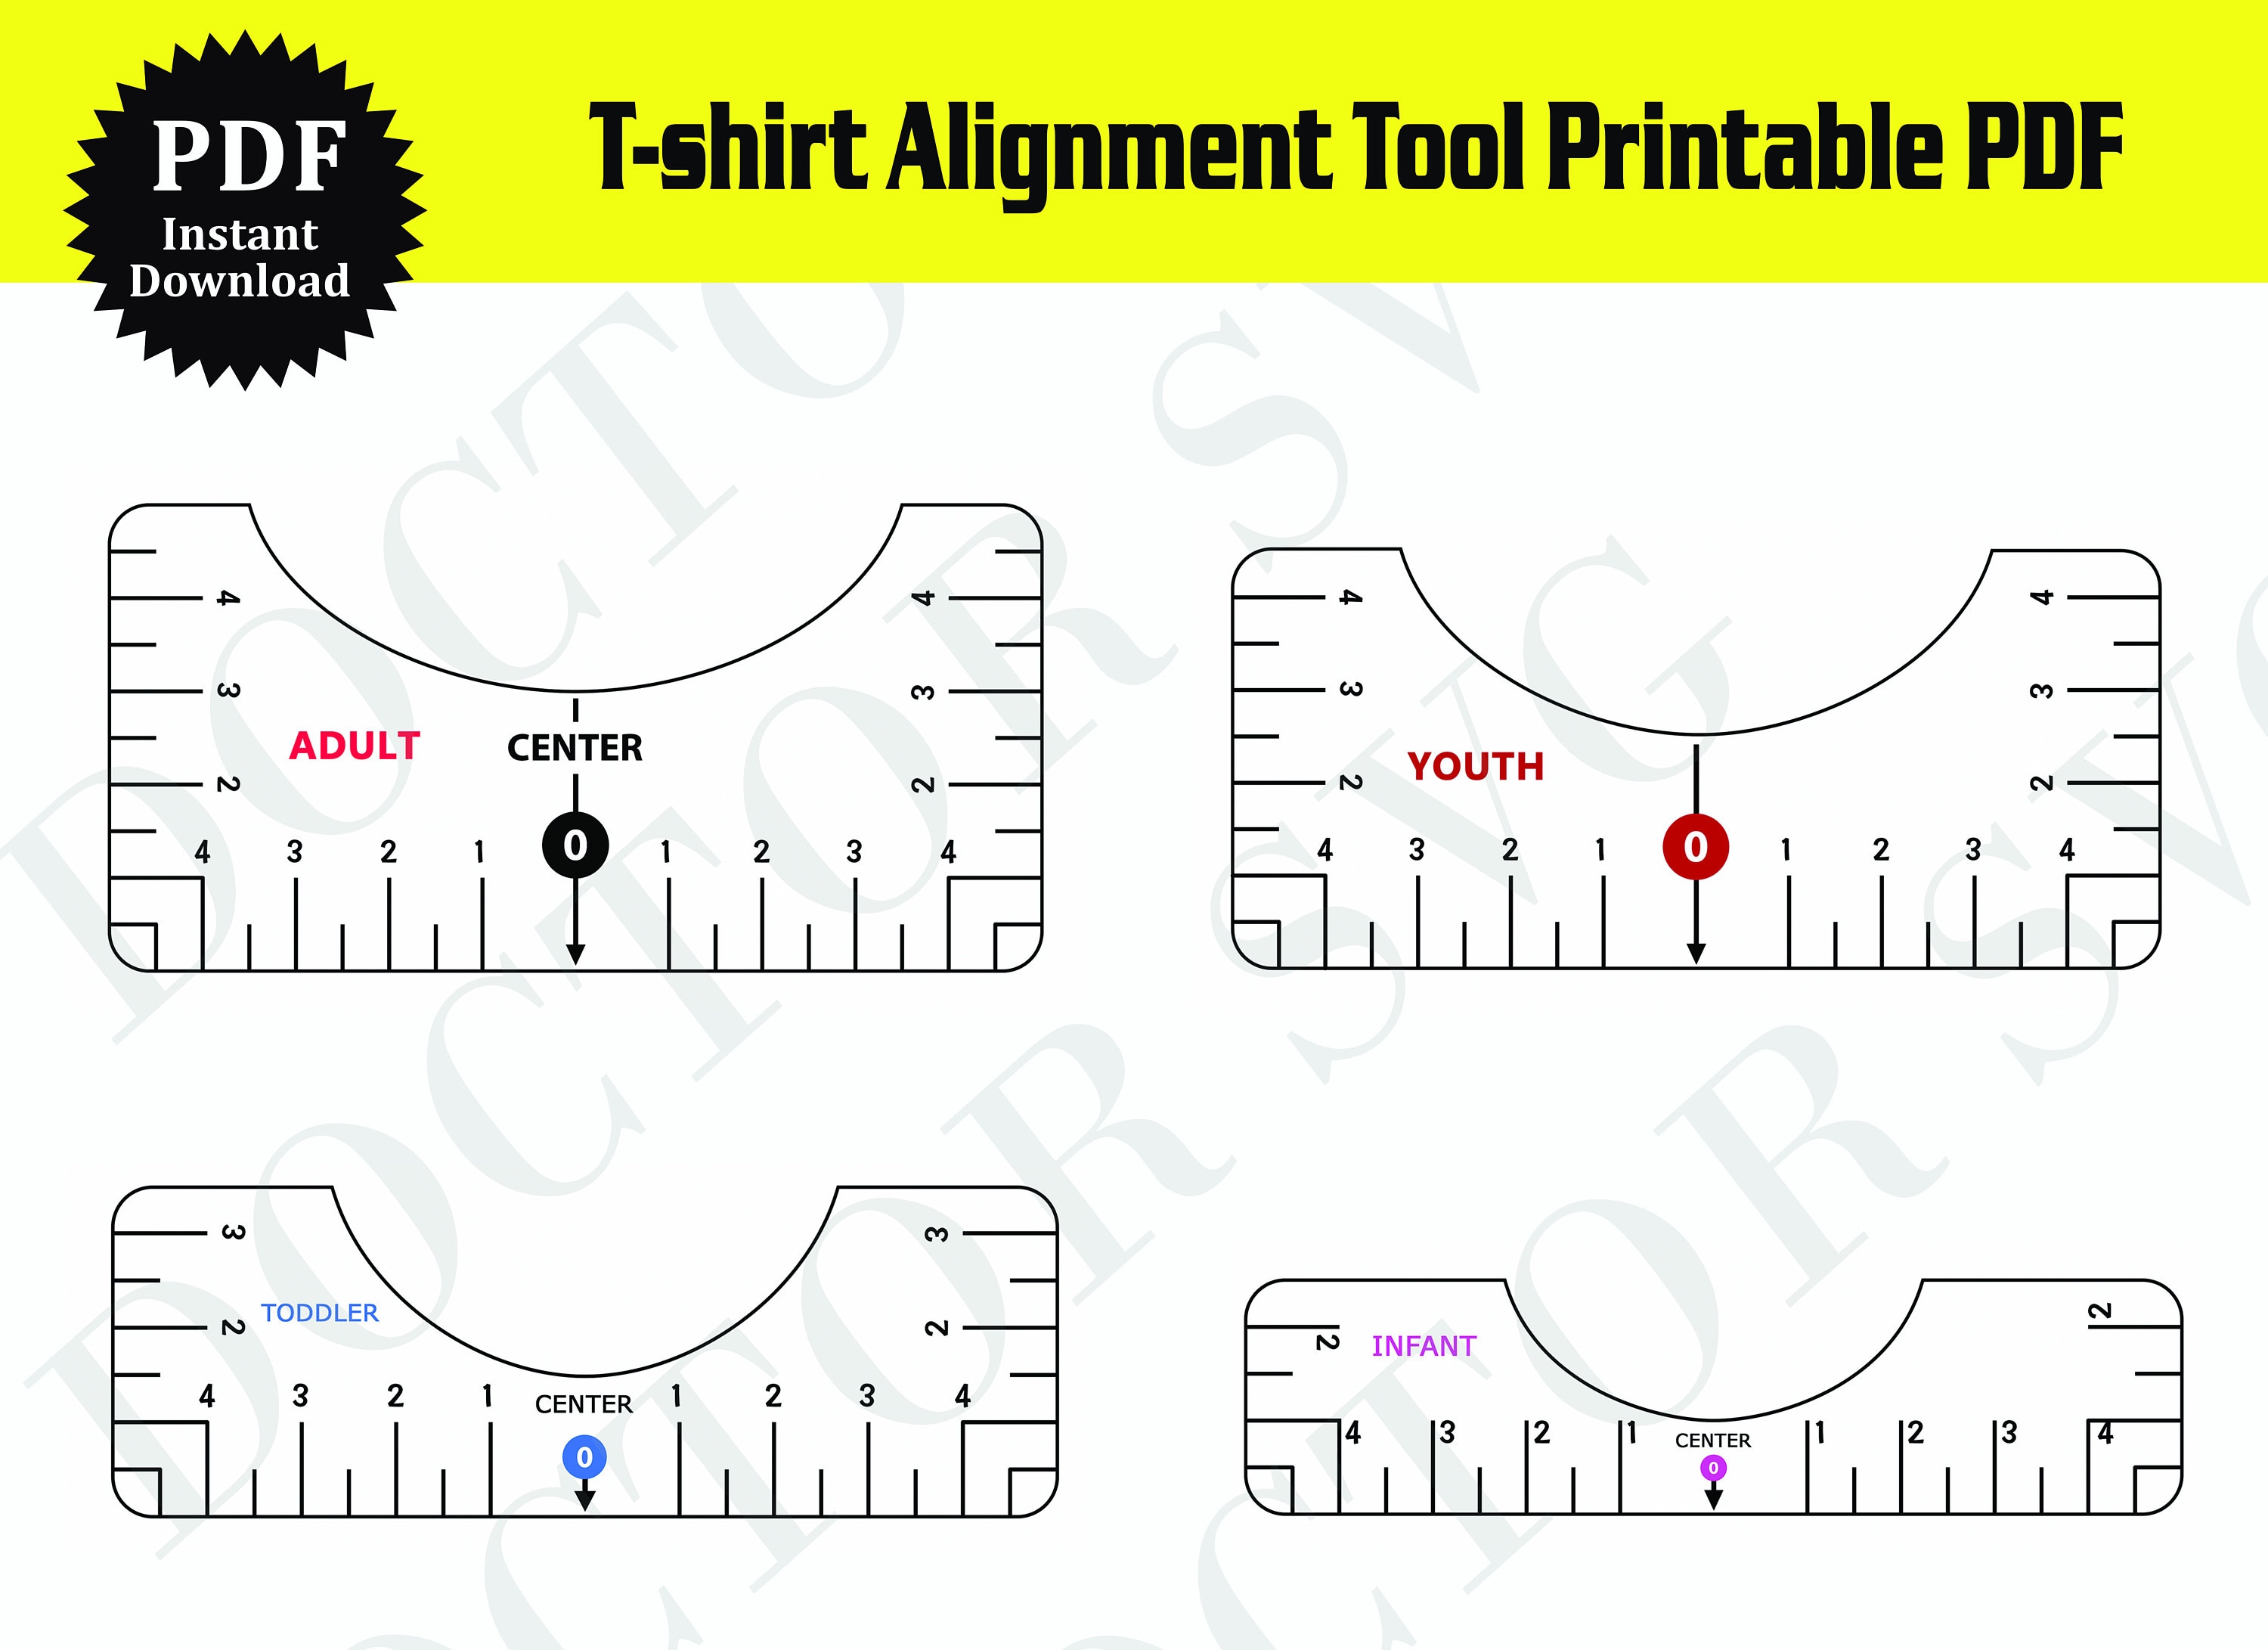
Tshirt Placement Ruler Tshirt Alignment Tool Centering Etsy
Web find the center of a shirt for decal placement. Upload the svg files to cricut design space and add them to. Web using a tape measure, measure 2″ to 3.5″ down from the collar on the front and back of the shirt, depending on the style. The easiest and fastest way to find the center of a shirt is.

44+ Size of htv for shirts ideas in 2021 This is Edit
Web find the center of a shirt for decal placement. Web check out our vinyl placement guide for tshirt selection for the very best in unique or custom, handmade pieces from our shops. Web here are my recommendations: Use my 50% rule to get the right decal size for shirts if you are designing a shirt and you’re not sure.
Place top of design 1.5 below neckline. To clarify, for each of them the size is only a recommendation. The first thing i do is find the exact center of the shirt. Web so here are my guidelines for determining the proper size and placement of a vinyl decal on a shirt. Web check out our vinyl placement guide for tshirt selection for the very best in unique or custom, handmade pieces from our shops. The easiest and fastest way to find the center of a shirt is to fold the shirt lengthwise lining up the shoulder seams at. This can be used with sublimation shirts, iron on vinyl, htv, or any way you are making shirts. Web using a tape measure, measure 2″ to 3.5″ down from the collar on the front and back of the shirt, depending on the style. While the final size of your design, and where you place it, will ultimately depend on your personal preference, we have developed a guide to help give you a baseline of what is commonly done. I just didn't want to forget what size it was!) 7x7 is great for youth sizes. Starting with an adult size small, set your standard transfer width at 8”. Use my 50% rule to get the right decal size for shirts if you are designing a shirt and you’re not sure how big to make it, grab a shirt out of the closet that you love and measure that graphic. Find this pin and more on cricut projects by crafting a lovely life. This is just a starting point!) a baby onesie is around 3x3. Here are the suggested transfer widths for the most common shirt sizes: Upload the svg files to cricut design space and add them to. Web here are some htv sizing and placement charts for different models of shirts, such as children’s shirts, youth shirts and adult shirts. Certainly, is possible to try and change the measurements according to the requirements. There are a few essential guidelines for fabric printing, like your design’s size, position, and quality. Sweatshirts top of the design 3 to 3.5 from the bottom of neck's edging.
To Clarify, For Each Of Them The Size Is Only A Recommendation.
Web 7.5 to 9 from the shoulder's left seam and 4 to 6 from the center, in line with the collar meeting the shoulder seam. Web so here are my guidelines for determining the proper size and placement of a vinyl decal on a shirt. There are a few essential guidelines for fabric printing, like your design’s size, position, and quality. Web check out our vinyl placement guide for tshirt selection for the very best in unique or custom, handmade pieces from our shops.
Web Before You Cut & Press Your Heat Transfer Vinyl Design, You Will Need To Properly Size It For Your Shirt.
Web using a tape measure, measure 2″ to 3.5″ down from the collar on the front and back of the shirt, depending on the style. While the final size of your design, and where you place it, will ultimately depend on your personal preference, we have developed a guide to help give you a baseline of what is commonly done. This shirt is youth size medium (and of course you want to take off the tag before you heat press! For a standard toddler shirt, start with around 5x5 (and remember you can go up and down a few inches!
The Easiest And Fastest Way To Find The Center Of A Shirt Is To Fold The Shirt Lengthwise Lining Up The Shoulder Seams At.
Web here are my recommendations: Here are the suggested transfer widths for the most common shirt sizes: Find this pin and more on cricut projects by crafting a lovely life. The first thing i do is find the exact center of the shirt.
Web Check Out Our Vinyl Tshirt Placement Printable Selection For The Very Best In Unique Or Custom, Handmade Pieces From Our Shops.
Use my 50% rule to get the right decal size for shirts if you are designing a shirt and you’re not sure how big to make it, grab a shirt out of the closet that you love and measure that graphic. Place top of design 1.5 below neckline. Starting with an adult size small, set your standard transfer width at 8”. Web here are some htv sizing and placement charts for different models of shirts, such as children’s shirts, youth shirts and adult shirts.